Breakaway Trottle Lock Install
4 posters
Page 1 of 1
 Breakaway Trottle Lock Install

Thought I might add this as it's own thread, when we original got onto the Breakaway in the Throttle Lock thread it was starting to get a little buried in the discussions. This thread is more about the installation than a discussion on different types of throttle locks/cruise controls.

To start off a couple of disclaimers, this is how I did it, you should always follow the manufacturers recommendations. I have tried to supplement those instructions with specific photos and findings from my own installation on my 2007 Bandit.
And yes I known there is a difference between a true cruise control and something that locks the right grip, and I am aware that this and other throttle locks will not maintain speed going up and down hills. I did not buy this unit to maintain an accurate 97.0525 kph, I was after something to make long trips a little less tiring and it had to be very safe to engage and dis-engage. I personally believe the Breakaway unit to be the safest on the market.
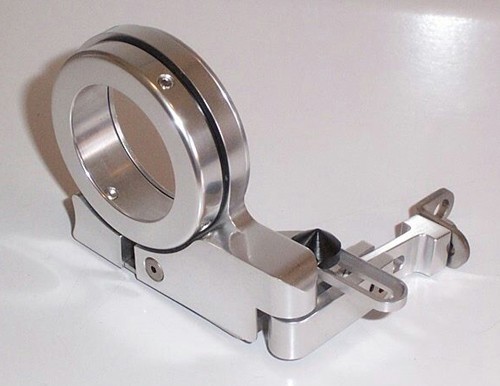
The Breakaway unit essentially slips over the grip, engage it with a press of your thumb keeping the throttle "locked" at that setting. Press another button or touch the hand-brake and it will dis-engage, you can also twist the throttle back if you want, but I think the other two methods would be faster and more intuitive.
Well, what do you get for your money (approx AU$245 delivered), basically it doesn't look all that much, but it is very well designed and machined. There are 5 different models, my 07 Bandit was Part No 6CB03-03. You also get the three Allen keys and a bag of extra pieces in case you need to adjust anything - I didn't need any of these parts. A small screw driver, a medium size adjustable spanner, and a 10mm spanner are about the only other tools you should need.
The black cam I am pointing to with the screw driver is what the hand-brake lever touches to disengage the unit.

You start off by removing the four small phillips-head screws from the Slip Ring Cover, this now gives you four basic parts, the black Adaptor Ring that goes on the hand grip itself, the Slip Ring collar that goes over this (at the top of the photo), the main body and the Slip Ring Cover (next to the four screws).

You first put the black Adaptor Ring on and then the Slip Ring Collar goes over the Adaptor Ring.


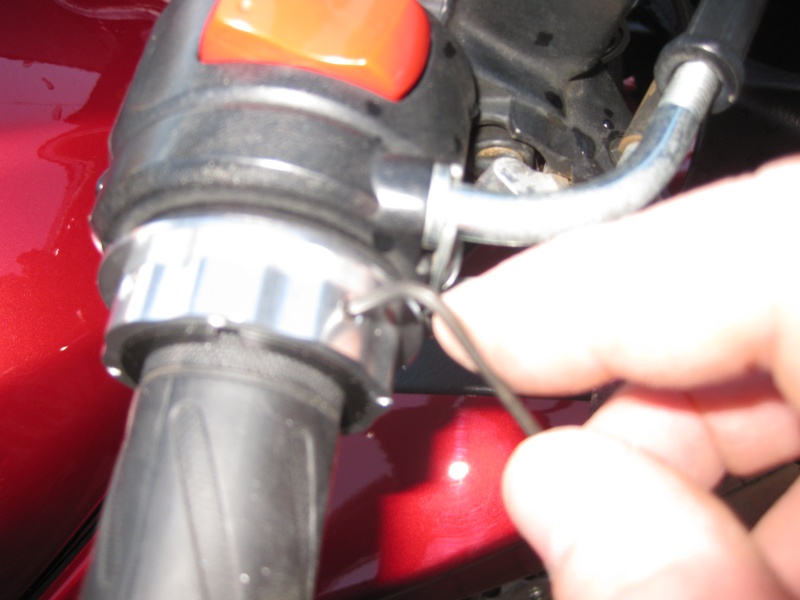
Make sure you have the rings square on the throttle. I placed the screw driver resting on the break lever next to the rings and twisted the throttle, if all is square the gap to the point of the screw driver remains constant.
You then tighten the four small Allen screws in the Slip Ring, this grips the Adaptor Ring. Ensure you do this evenly and at half then quarter turns of the Allen key, when you feel it become tight just snug it, do not over tighten. Place the main body on - there are small curved cams that mate the main body and the Slip Ring. Then put the Slip Ring Cover on and replace the four screws, this completes the hand grip part of the installation. The main body of the unit will still be free to spin round, don't worry about this yet.


Loosen the bolt holding the angled End Bracket plate, the small Allen screw holding the Slide, and the large Allen screw locking the Swivel. Undo the lock nut off the bottom of the hand-brake pivot bolt, maneuver the End Bracket so it slips onto the end of the hand-brake bolt and replace the lock nut. Tighten up all the nuts, bolts and Allen screws, remember to hold onto the various parts when tightening so you do not twist them, I found an adjustable spanner the best for holding the metal blocks.

This shot (sorry about the focus) shows the black cam in place next to the hand-brake lever. There is a small Allen-screw under the cam so that you can slide it up or back to get the best adjustment.


I found I needed to put more tension on the lock as the throttle return spring was over-powering the unit. This was a simple matter of undoing the two small screws at the top of the plate marked BPI underneath the main unit, putting in an Allen key in a small hole between the two screws and levering the plate back towards the bike. If you found there was too much tension, you lever the plate the other way. Again sorry bout the focus - got to learn where the macro button is on my camera.

When everything was tight and working correctly, I started the bike, here are a couple of shots with the lock on and the rev's being held.


And, just in case you didn't see the other post, here are the buttons for engaging/dis-engaging. In my opinion it seems a lot easier than trying to tighten something at the end of the handle bar.

Hope you find this useful, all up you should be able to install the Breakaway in approx 30 minutes, it is very simple.
Barry
Last edited by barry_mcki on Thu 07 Oct 2010, 6:56 pm; edited 1 time in total
 Re: Breakaway Trottle Lock Install
Looks good mate, well made.
U can Lock it on and jump in the side car with the wife now. LOL
U can Lock it on and jump in the side car with the wife now. LOL
 Re: Breakaway Trottle Lock Install
Haven't quite worked out the bugs in the GPS controlled automatic steering controller...... 
 Re: Breakaway Trottle Lock Install
Excellent install manual. Well done. I still think they take up to much space on the handgrip but they look very well made.

Saikhan- Posts : 765
Join date : 2010-01-19
Age : 58
Location : Gladstone Qld.
 Re: Breakaway Trottle Lock Install
Some great pics, and a very neat looking installation. Well done!
I had a similar set up on a previous bike, and found that I had to cut the "ridge" off the end of the grip (where it meets the bar end weight) because the lock pushed my hand across just enough to sit over the top of it. Having that dig into the side of your palm is annoying, and eventually painful, on a long trip.
The Kaoko I've got this time round avoids that problem, but doesn't have the safety cut off feature yours does. Admittedly it doesn't actually "lock" the throttle, and being a left hand thread means you can still easily snap it off by hand.
Pete- Posts : 94
Join date : 2010-10-07
 Similar topics
» Vista Throttle Lock Question
» throttle lock
» Givi SL103 lock set
» Helmet lock Wires
» Givi Tank lock T480
» throttle lock
» Givi SL103 lock set
» Helmet lock Wires
» Givi Tank lock T480
Page 1 of 1
Permissions in this forum:
You cannot reply to topics in this forum