R/C Model Aeroplane..
+9
keenaviator
madmax
Re-Cycled
mtbeerwah
phill north
paul
2wheelsagain
Hammy
Bhoffo
13 posters
Page 2 of 2
Page 2 of 2 •  1, 2
1, 2
 R/C Model Aeroplane..
First topic message reminder :
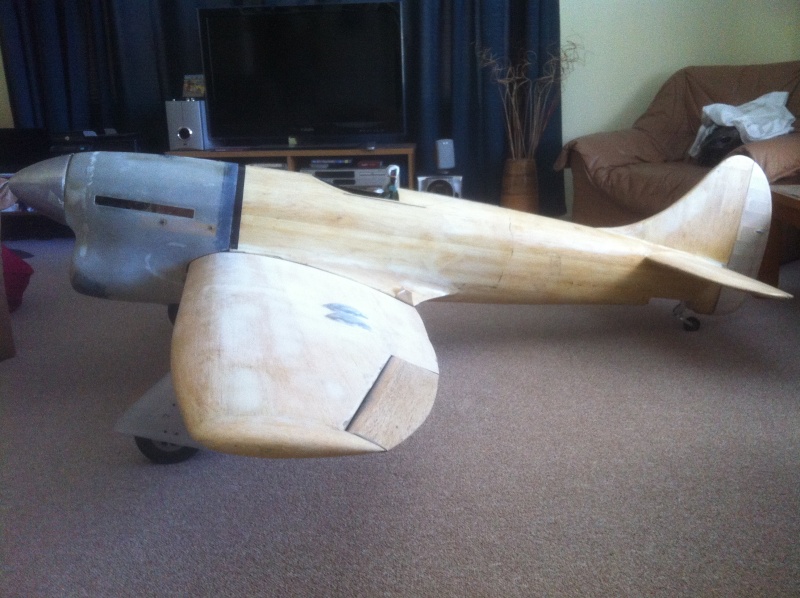
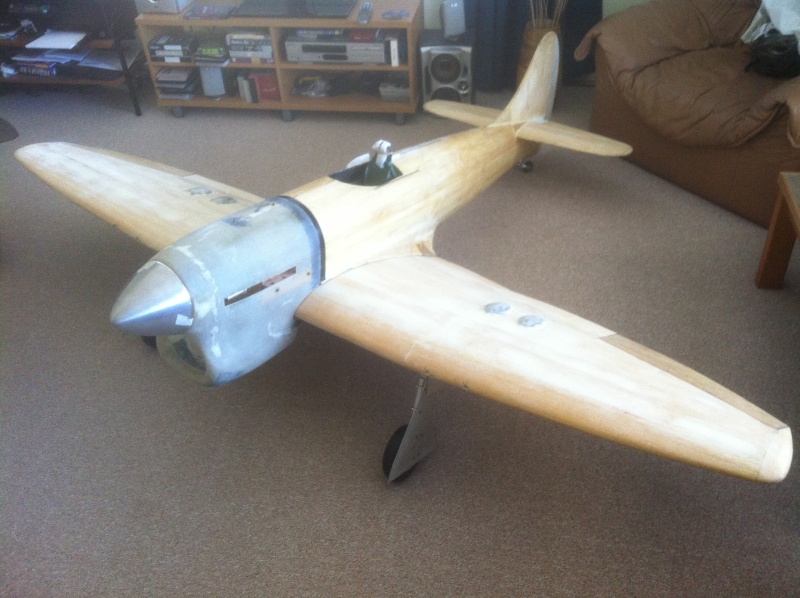
A few months ago I 'piggybacked' someone else's thread with a few photographs of a large 'MkV Hawker Tempest' that I've been building for about 2 years.. well it is getting closer to the painting stage... now have the cockpit installed, most servos in and operational to movable flying surfaces and have spent the past few days fitting the fiberglass cowling (it was bought from the USA but had quite a few imperfections in it that I've had to repair)
The photos probably don't do it justice, it has a wingspan of 8 feet and the leading edge is actually about 12 inches above the ground..currently it's together on my lounge room floor (the wing comes away from the fuselage) as I was trying to get an idea of how much weight I was going to have to put in the front of it to get it to balance.. It appears that the whole thing will weigh in at about 15 - 17kgs including around 3kg of weight I'm going to need up front for balance..
It's going to be powered by a 80cc single cylinder 2 stroke petrol engine swing a 26" prop with around 10" of pitch - top Rpm expected to be about 7500 - 8000..
So a few more weeks of work on the 'fit out' and then to the spray booth... then to start marking all the panel lines and rivet marks...(don't want to think about how many of these!), about 10 different colours to be sprayed on in total including all the nose art and squadron markings... (I'm tired thinking about it!)


Bhoffo- Posts : 617
Join date : 2011-07-04
Age : 66
Location : Katoomba - Blue Mts - NSW
 Re: R/C Model Aeroplane..
All finished but problems with the engine. 
I had purchased an 80cc 2 Stroke (petrol) engine last year - it was recommended to me by a fellow R/C flyer- but I hadn't run it. Luckily I decided to 'bench' run it first and was standing behind it as I did! The 25" dia prop is held on the to the prop-driver/crankshaft by 6 x 5mm high tensile bolts. The engine stopped suddenly and the 6 bolts were sheared off at the hub and the prop went spinning down the backyard! After much cursing etc
  I managed to get the prop driver off but then couldn't get the broken bolts out, they were jammed in and no matter what I did (easy-outs/ cold and hot) nothing worked so I ordered another which arrived around new year.
I'd been told that the bolt holes I had drilled into the timber propeller were too 'tight' and I may have had side pressure on them causing them to fracture; so I increased the bolt hole size and went again...So had the motor together and it was running ok for quite a while. Thought I'd give it at least an hour or two of running as they were supposed to be pretty 'tight' from the factory and running in on a bench was good for them.. So the next thing that happened was that a leak appeared between the backplate and crankcase. We (other flying mates and I) thought it was probably a 'gasket' issue so later on I took the thing apart. What I found was astounding!
  The big end of the con-rod was mounted on the crank pin and to prevent 'end-float' there was a steel button attached to the crank pin. This had been grinding itself away on the aluminium backplate of the motor and worse 2 x 5mm bolts that held the carbie on the rear of the engine and that protruded slightly into the crankcase! The 'button' on the big end was horribly gouged as was the backplate (see photos)!
 I'm thinking nwo that perhaps this issue is what caused the engine to stop suddenly in the first place and cause the prop to break off... thankfully no one was in front of it when it did this or that it was mounted in the model; could have been disastrous for all!
I wrote a long complaining letter to the manufacturer of the engine with photos and they replied that they would supply me with a new engine with an 'improved' crank shaft... According the Aust. post the package is now in Sydney and hopefully will arrive at my doorstep in the next few days. I'm going to take it to another R/C flyer who is also an engineer who is going to check all the tolerances before I begin to run it. Unfortunately all this means that I won't get to have my model in the air until sometime late April or May - hopefully - as I'm going away for a couple of months in about 2 weeks time.. don't want to rush things now after all the work and expense so better to wait and ensure all is right before the maiden flight!
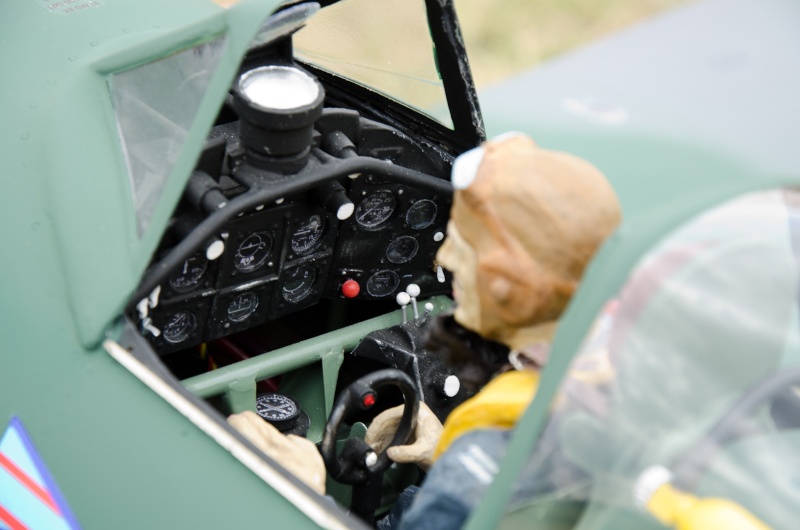
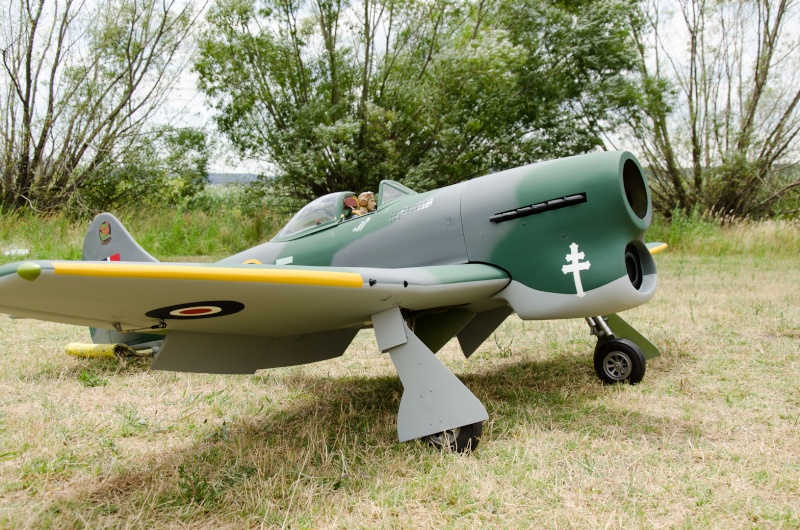
Anyhow, here are a couple of 'high-def' photos taken by a mate when I took the model out for 'show and tell' last week... also a couple of snappies of the internal damage to the engine!
Unfortunately I wasn't able to lower the tail wheel manually, I'd retracted it using the pneumatics but it was locked up and for the time being the pneumatics were disconnected..


 Flaps down!


The 'big-end' button on crank pin.

The damage to the aluminium backplate.

I had purchased an 80cc 2 Stroke (petrol) engine last year - it was recommended to me by a fellow R/C flyer- but I hadn't run it. Luckily I decided to 'bench' run it first and was standing behind it as I did! The 25" dia prop is held on the to the prop-driver/crankshaft by 6 x 5mm high tensile bolts. The engine stopped suddenly and the 6 bolts were sheared off at the hub and the prop went spinning down the backyard!
I'd been told that the bolt holes I had drilled into the timber propeller were too 'tight' and I may have had side pressure on them causing them to fracture; so I increased the bolt hole size and went again...So had the motor together and it was running ok for quite a while. Thought I'd give it at least an hour or two of running as they were supposed to be pretty 'tight' from the factory and running in on a bench was good for them.. So the next thing that happened was that a leak appeared between the backplate and crankcase.
I wrote a long complaining letter to the manufacturer of the engine with photos and they replied that they would supply me with a new engine with an 'improved' crank shaft...
Anyhow, here are a couple of 'high-def' photos taken by a mate when I took the model out for 'show and tell' last week... also a couple of snappies of the internal damage to the engine!
Unfortunately I wasn't able to lower the tail wheel manually, I'd retracted it using the pneumatics but it was locked up and for the time being the pneumatics were disconnected..


 Flaps down!

The 'big-end' button on crank pin.

The damage to the aluminium backplate.


Bhoffo- Posts : 617
Join date : 2011-07-04
Age : 66
Location : Katoomba - Blue Mts - NSW
 Re: R/C Model Aeroplane..
That's no good at all! I guess better to find out on the ground rather than during the maiden flight?
Shearing those bolts would take a bit of force!
In single shear, each bolt should (in theory) take around 1.6 tonne of load to shear. Multiply that x 6 bolts and your talking just over 9.5 tonnes of torque load (shear load). Serious models!
Appreciate you keeping us updated tho. Hopefully the "improved" engine will sort it.
Bill.

NTBill- Posts : 320
Join date : 2011-07-25
Age : 63
Location : Darwin Rural, NT.
 Re: R/C Model Aeroplane..
Thanks for that info Bill... bloody hell!  Didn't realise that type of force would have been needed to shear the bolts, as you say, better to find out on the ground than in the air.

Bhoffo- Posts : 617
Join date : 2011-07-04
Age : 66
Location : Katoomba - Blue Mts - NSW
 Re: R/C Model Aeroplane..
Sorry to hear of the engine dramas Bruce - but the model looks outstanding - well done, she's a credit to you.

Ewok1958- Posts : 3940
Join date : 2010-08-03
Age : 66
Location : Bega, NSW
 Re: R/C Model Aeroplane..
Sounds like the Jabiru engine for my 'model' is not so bad after all 

keenaviator- Posts : 54
Join date : 2012-11-18
 Re: R/C Model Aeroplane..
Yes.. it was a real pain in the you know where! I'm going overseas for 2 months and had hoped to get the model in the air before I left - but that is not going to happen now!  The earliest I'm thinking for the maiden flight now will be late Aprill or early May.. Just have to be patient!

Bhoffo- Posts : 617
Join date : 2011-07-04
Age : 66
Location : Katoomba - Blue Mts - NSW
Page 2 of 2 •  1, 2
1, 2
 Similar topics
» Is this the ABS model
» What Got You Into Bikes?
» Can some one tell me what model this is ???????
» Bmw new model
» Model numbers, K6, K7 etc
» What Got You Into Bikes?
» Can some one tell me what model this is ???????
» Bmw new model
» Model numbers, K6, K7 etc
Page 2 of 2
Permissions in this forum:
You cannot reply to topics in this forum