Updated/redesigned Delkevic Headers
3 posters
Page 1 of 1
 Updated/redesigned Delkevic Headers


I picked up my Kit June 11, 2014. The Kit no longer supplies the paste; it is not listed on the inventory sheet, in the USA anyway. The head pipes have a slip fit into the collector. I believe that these are much easier to install after reading other years installation problems.
I bolted the collector to the frame, loosely. I used my exhaust paste on the inside of the collector and the pipe. I installed one pipe at a time. The last pipe did not align properly with the exhaust port and I got out the Rubber Mallet. The problem was the exhaust pipe collar slipped all the way down (notice that collar in the first photo). Keep an eye on those collars.
I really like the added clearance underneath and probably more room to get the oil filter out to the left.
Now I'm trying to get the Radiator cap assembly off. Doing the Plugs & PAIR now which are harder than the headers. And hopefully the Butterflies.
Thanks for everyone's posted information and responses.
doubleD- Posts : 27
Join date : 2014-06-27
 Re: Updated/redesigned Delkevic Headers
Did you get yourself an O2 eliminator. You will need one with the free flow headers.

Hammy- Posts : 4446
Join date : 2011-08-09
Age : 65
Location : The Rock
 Re: Updated/redesigned Delkevic Headers


I sniped the wire to the ECU recommended by Healtech. This fools the computer and does not set a code or light on dash. The previous owner installed a PC3 but did not eliminate the O2 sensor. It was running rich before I did this. After doing removing the Butterflies, I'm taking it to a Dyno.
doubleD- Posts : 27
Join date : 2014-06-27
 Re: Updated/redesigned Delkevic Headers
With the Butterflies, some focused heat from a pencil torch and a good fitting small cross tip screw driver should do the trick. Contray to what has been wrote in the past you don't need a JIS screw driver just a good quality #0, well at least I didn't. Apply the flame to heat the head of the screw for about 15 - 20 seconds then try un-screwing, there should be a small crack sound as you break the lock-tite on the treads. If it's too tight try a little more heat.
Do one screw at a time - and don't pickup the screws with your fingers like I did - they're bloody hot

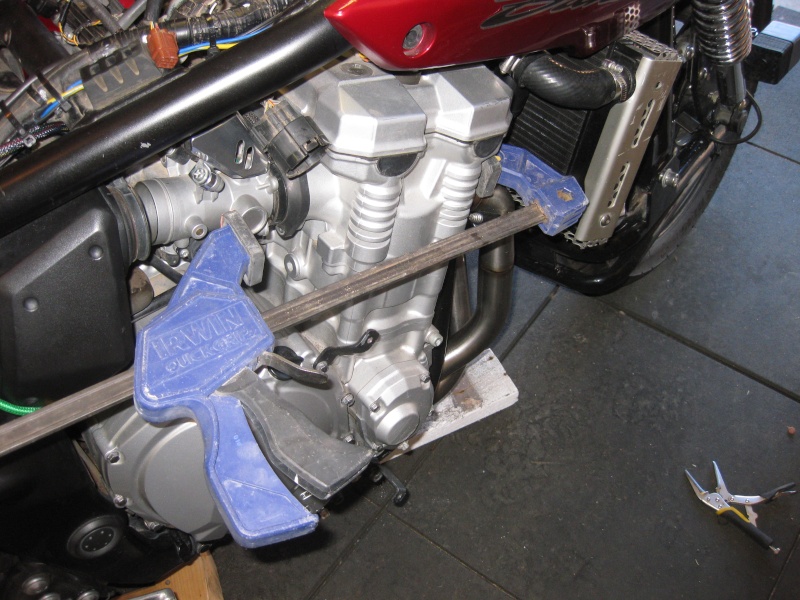
Another tip is that you don't need to undo the throttle cables, there is enough slack to bring the injector bodies out the right side of the bike once you have moved the air box back, undone the main round electrical connector, a couple of air and fuel pipes and slipped the bodies out of the block boots. By leaving the throttle intact saves you grief when putting everything back together. I also used large rubber jaw clamps on either side of the throttle bodies to seat them back in the boots on re-assembly.


Do one screw at a time - and don't pickup the screws with your fingers like I did - they're bloody hot

Another tip is that you don't need to undo the throttle cables, there is enough slack to bring the injector bodies out the right side of the bike once you have moved the air box back, undone the main round electrical connector, a couple of air and fuel pipes and slipped the bodies out of the block boots. By leaving the throttle intact saves you grief when putting everything back together. I also used large rubber jaw clamps on either side of the throttle bodies to seat them back in the boots on re-assembly.


 Similar topics
» Delkevic Headers Installed
» DELKEVIC HEADERS
» Delkevic Headers
» Delkevic headers
» Delkevic Headers.
» DELKEVIC HEADERS
» Delkevic Headers
» Delkevic headers
» Delkevic Headers.
Page 1 of 1
Permissions in this forum:
You cannot reply to topics in this forum