
iPhone mount and 3BR TAPP USB power port
2 posters
Page 1 of 1

iPhone mount and 3BR TAPP USB power port
![]() TropoBone Sun 06 Apr 2014, 8:38 pm
TropoBone Sun 06 Apr 2014, 8:38 pm
I like the value proposition of the Bandit 1250, lots of bang for my buck.
I also like gadgets. My iPhone 4S might no longer be the race as the most powerful pocket sized computing and comms device, but it has paid for itself, and I had an idea it could be useful combined with my bang for buck Bandit.
Take one iPhone 4/4s bicycle mount found in the bargain bin of a cycling store, $40...

(No, that is not my Bandit handlebars!)
Add one BlueAnt bluetooth interphone from my BMW riding mate Craig, surplus to his needs, $50...

And power it all using a 3BR Power Sports TAPP 2.1A USB power port, US$65 delivered....

... and I reckon I've got a system that apart from tyre pressure monitoring, is as good as, or better than, anything a BMW 1600 GT rider has!
I chose a 2.1A USB because:
- Living in the Top End, where the daily temperature is 28ºC - 33ºC year round, I would never need a heated jacket. I cannot think of anything that I would need to power with a regular 12V socket.
- 2.1A would charge any of my gadgets, should I wish to have an iPad or a digital camera on charge in a tank bag.
The trickiest part, if you can call it that, was installing the 2.1A USB power connector.
The USB kit came with all the parts shown above, plus a "Posi-Tap", and some well written instructions.
First thing was to locate the iPhone mount and then the USB outlet. I located the iPhone mount on the handlebar between the clamps. I located the USB to the left of the clamp, before the upward bend of the bars to the left switch block.
The USB outlet is fixed using pressure sensitive adhesive, and I added the recommended two cable ties for extra security.
I then unlocked and removed the seat, both side covers, and undid the two fuel tank bolts. Lifting the tank made it easier to route the USB cable along the electrics cable routing from the left switch block to the battery/under seat area. I propped the tank up with a 2x4 off cut, and took up the slack in the cable run with the handle bars turned full left. I used a couple of cable ties to secure it to that point, then i checked lock-to-lock handlebar movement to ensure that the cable was not being pulled when full left, or too slack when full right. That being done, it was time to lower the fuel tank back into place and bolt it down again.
Time to run the cable back to the battery and under seat tray. I followed the wiring loom from the handlebars, securing using the cable ties provided. The fattest part of the power cable was the splash proof 7.5A blade fuse housing. It was easier to route once I followed the suggestion in the instructions to open the fuse holder and remove the fuse.
Once I had the cable run to the battery/underseat tray, it was a pretty simple affair. I attached the black cable with its galvanised terminator, to the -ve battery terminal. I then ran the red cable and fuse box along the right side of the undersea tray all the way back to the tail so that I could use the +ve from the tail lamp/license plate lamp. A switched source such as the tail lamp was important to me, as directly connecting to the battery meant that the residual power draw of the USB outlet will drain the battery, possibly dead flat within three days. So switched source it was, and the brown tail lamp +ve was was easy to find. This is where I found the 3BR USB cable to be a little bit too short to meet the brown cable in the duck tail. However, with the posi-tap, it could reach the grey cable on the other side of the snap connector to the stop/tail lamp. No worries!
Now that everything was hooked up, time to test. Key in ignition, iPhone connected with normal Apple cable to the USB, turn on. Bugger! No power. Aha! Still have the 7.5A fuse in my pocket, I'd removed it to assist cable routing as suggested in the excellent instructions. Replaced fuse.
Bingo!! USB now charging my iPhone - success
Just as I was packing my tools, congratulating myself on how clever I was, down comes a late Wet season downpour. So all testing done in the carport.
Photos of install to come (I take photos with the iPhone, hard to take photos of a gadget installation when the gadget is the camera!)
How does it work.
Well, the highest power consumption rate I've seen when using the iPhone or iPad is when using Assisted GPS in navigation applications.
The 2.1A power source means that the iPhone not only runs, but is charged while navigating, with full screen brightness, and Bluetooth comms active. I should be able to navigate for one tank of fuel, then charge an iPad or camera in my tank bag for the next tank of fuel, and swap back, when I am touring on the Bandit.
So I'm pretty pleased.
As for navigation apps, a bloke is spoilt for choice. I use Google Maps and iOS Maps when I'm going to a new or unfamiliar location within cellular coverage
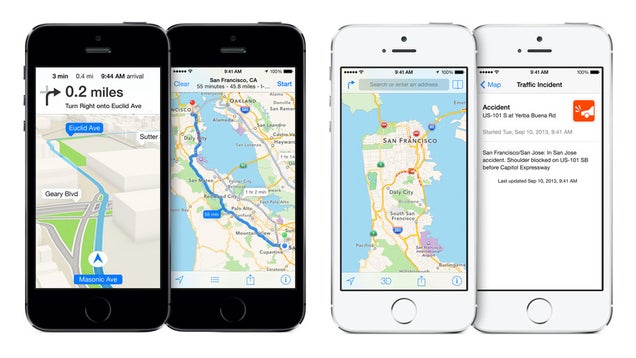
But there's some REALLY big gaps in Vodafone cellular coverage across the Top End. So when I reckon I will go outside of cellular range, I use one of two FREE navigation apps:
Navfree Australia - has a full internal database of all Australian roads. You can navigate 'home', to a point of interest, etc, and you do not need to be within 3G coverage.

Another dead useful nav app is one not many bike riders think about, because it is an app for aircraft pilots - OzRunways EFB (electronic flight bag)
https://www.ozrunways.com/images/product/nz.jpg
I downloaded it because I'm 'in the business' but a fellow aviator used his copy, on an iPad, to have 1:250,000 topo charts for his holiday following the Gibb River Road (WA). You have nav, and you can see which creek crossing are coming up, etc.

But the app I use the most, is Trapster. It is brilliant. Radar detectors are illegal I'm told, but this is not. Simply having it on while you are travelling will remind you of upcoming red light cameras, and the fact that you have travelled a road ahead of a fellow trapster user and not encountered a revenue raiser, will give the guy behind you some comfort.
The best thing though, is almost real time reporting of accidents, building works, and other hazards that would slow you down.

So...
The bargain bin iPhone mount keeps my all-purpose navigation/computing gadget secure and weatherproof, only requiring a quick glance down to see what is up.
The (mostly free) navigation apps mean that I can find the fastest route to wherever the hell I want to go, inside or outside of cellphone coverage, with hazard alerting if I want it,
The second-hand-mates-rates Blueant communicator means that I don't have to look at the screen - audio alerts and turn-by-turn directions are beamed to my left ear!
The 2.1A USB power source means that my iPhone and other gadgets are fully charged when I get off the bike!
Gotta be happy with that!

I also like gadgets. My iPhone 4S might no longer be the race as the most powerful pocket sized computing and comms device, but it has paid for itself, and I had an idea it could be useful combined with my bang for buck Bandit.
Take one iPhone 4/4s bicycle mount found in the bargain bin of a cycling store, $40...
(No, that is not my Bandit handlebars!)
Add one BlueAnt bluetooth interphone from my BMW riding mate Craig, surplus to his needs, $50...
And power it all using a 3BR Power Sports TAPP 2.1A USB power port, US$65 delivered....
... and I reckon I've got a system that apart from tyre pressure monitoring, is as good as, or better than, anything a BMW 1600 GT rider has!
I chose a 2.1A USB because:
- Living in the Top End, where the daily temperature is 28ºC - 33ºC year round, I would never need a heated jacket. I cannot think of anything that I would need to power with a regular 12V socket.
- 2.1A would charge any of my gadgets, should I wish to have an iPad or a digital camera on charge in a tank bag.
The trickiest part, if you can call it that, was installing the 2.1A USB power connector.
The USB kit came with all the parts shown above, plus a "Posi-Tap", and some well written instructions.
First thing was to locate the iPhone mount and then the USB outlet. I located the iPhone mount on the handlebar between the clamps. I located the USB to the left of the clamp, before the upward bend of the bars to the left switch block.
The USB outlet is fixed using pressure sensitive adhesive, and I added the recommended two cable ties for extra security.
I then unlocked and removed the seat, both side covers, and undid the two fuel tank bolts. Lifting the tank made it easier to route the USB cable along the electrics cable routing from the left switch block to the battery/under seat area. I propped the tank up with a 2x4 off cut, and took up the slack in the cable run with the handle bars turned full left. I used a couple of cable ties to secure it to that point, then i checked lock-to-lock handlebar movement to ensure that the cable was not being pulled when full left, or too slack when full right. That being done, it was time to lower the fuel tank back into place and bolt it down again.
Time to run the cable back to the battery and under seat tray. I followed the wiring loom from the handlebars, securing using the cable ties provided. The fattest part of the power cable was the splash proof 7.5A blade fuse housing. It was easier to route once I followed the suggestion in the instructions to open the fuse holder and remove the fuse.
Once I had the cable run to the battery/underseat tray, it was a pretty simple affair. I attached the black cable with its galvanised terminator, to the -ve battery terminal. I then ran the red cable and fuse box along the right side of the undersea tray all the way back to the tail so that I could use the +ve from the tail lamp/license plate lamp. A switched source such as the tail lamp was important to me, as directly connecting to the battery meant that the residual power draw of the USB outlet will drain the battery, possibly dead flat within three days. So switched source it was, and the brown tail lamp +ve was was easy to find. This is where I found the 3BR USB cable to be a little bit too short to meet the brown cable in the duck tail. However, with the posi-tap, it could reach the grey cable on the other side of the snap connector to the stop/tail lamp. No worries!
Now that everything was hooked up, time to test. Key in ignition, iPhone connected with normal Apple cable to the USB, turn on. Bugger! No power. Aha! Still have the 7.5A fuse in my pocket, I'd removed it to assist cable routing as suggested in the excellent instructions. Replaced fuse.
Bingo!! USB now charging my iPhone - success
Just as I was packing my tools, congratulating myself on how clever I was, down comes a late Wet season downpour. So all testing done in the carport.
Photos of install to come (I take photos with the iPhone, hard to take photos of a gadget installation when the gadget is the camera!)
How does it work.
Well, the highest power consumption rate I've seen when using the iPhone or iPad is when using Assisted GPS in navigation applications.
The 2.1A power source means that the iPhone not only runs, but is charged while navigating, with full screen brightness, and Bluetooth comms active. I should be able to navigate for one tank of fuel, then charge an iPad or camera in my tank bag for the next tank of fuel, and swap back, when I am touring on the Bandit.
So I'm pretty pleased.
As for navigation apps, a bloke is spoilt for choice. I use Google Maps and iOS Maps when I'm going to a new or unfamiliar location within cellular coverage
But there's some REALLY big gaps in Vodafone cellular coverage across the Top End. So when I reckon I will go outside of cellular range, I use one of two FREE navigation apps:
Navfree Australia - has a full internal database of all Australian roads. You can navigate 'home', to a point of interest, etc, and you do not need to be within 3G coverage.
Another dead useful nav app is one not many bike riders think about, because it is an app for aircraft pilots - OzRunways EFB (electronic flight bag)
https://www.ozrunways.com/images/product/nz.jpg
I downloaded it because I'm 'in the business' but a fellow aviator used his copy, on an iPad, to have 1:250,000 topo charts for his holiday following the Gibb River Road (WA). You have nav, and you can see which creek crossing are coming up, etc.
But the app I use the most, is Trapster. It is brilliant. Radar detectors are illegal I'm told, but this is not. Simply having it on while you are travelling will remind you of upcoming red light cameras, and the fact that you have travelled a road ahead of a fellow trapster user and not encountered a revenue raiser, will give the guy behind you some comfort.
The best thing though, is almost real time reporting of accidents, building works, and other hazards that would slow you down.
So...
The bargain bin iPhone mount keeps my all-purpose navigation/computing gadget secure and weatherproof, only requiring a quick glance down to see what is up.
The (mostly free) navigation apps mean that I can find the fastest route to wherever the hell I want to go, inside or outside of cellphone coverage, with hazard alerting if I want it,
The second-hand-mates-rates Blueant communicator means that I don't have to look at the screen - audio alerts and turn-by-turn directions are beamed to my left ear!
The 2.1A USB power source means that my iPhone and other gadgets are fully charged when I get off the bike!
Gotta be happy with that!
_________________
"What one man has done, another can do."
Darwin NT
Silver '08 Bandit 1250SA
Staintune pipe.
Michelin Pilot 2 front and rear
Ventura rack and bag, Kappa K33N panniers.
Racetech gold valves and fork springs.

TropoBone- Posts : 59
Join date : 2013-01-25
Re: iPhone mount and 3BR TAPP USB power port
![]() Mpottsy Fri 11 Apr 2014, 2:41 pm
Mpottsy Fri 11 Apr 2014, 2:41 pm
Great write up.
I have a Lifeproof case and holder on my bike and one for the car. The Bike set up i modified and attached the holder to a ram mount. I can now use the left over bracket for use with the holder from the car on my push bike and use mapmyride as a bike computer. The mountings are very secure and the cases are fully waterproof.
Cost a little more that what your set up did but check these out anyway. Not completely bank busting at around $150 total.
Lifeproof Ebay
_________________
Mpottsy
-------------
GSX1250FA 2010
Scorpion Pipe
Givi Set with Admore Lights
Garmin Zumo 660
DW Stage 2 with Secondaryectomy
MRA Vario Screen
Oxford Grips
VCM Seat
HID conversion

Mpottsy- Posts : 468
Join date : 2011-04-21
Age : 52
Location : Telopea, NSW
» Adelaide - Port Augusta - Port Lincoln - Ceduna - Port Augusta - Adelaide
» Iphone apps.
» Will Your iPhone Get You Booked?
» Iphone Pano shot
» iPhone 3GS waterproof holder & charger
» Iphone apps.
» Will Your iPhone Get You Booked?
» Iphone Pano shot
» iPhone 3GS waterproof holder & charger
Page 1 of 1
Permissions in this forum:
You cannot reply to topics in this forum|
|
|