
Fixing “Suzuki rot” on engine cover
4 posters
Page 1 of 1

Fixing “Suzuki rot” on engine cover
![]() Meatbix Thu 29 Apr 2021, 5:53 pm
Meatbix Thu 29 Apr 2021, 5:53 pm
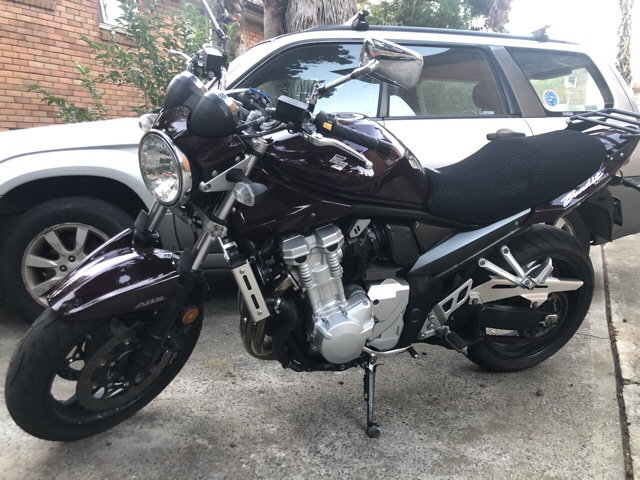
My otherwise tidy, 23,000km bike had a bad case of ‘Suzuki rot’ on the front of the left engine cover. You know the stuff, the nasty bubbling and flaking of the cheap engine enamel zukes use. Combined with some scuffs from a stationary drop (make sure that kickstand is actually down people. Bandits are heavy!) I decided to have crack at a quick repaint, and was pleasantly surprised with the result!
Time taken:
Materials used:
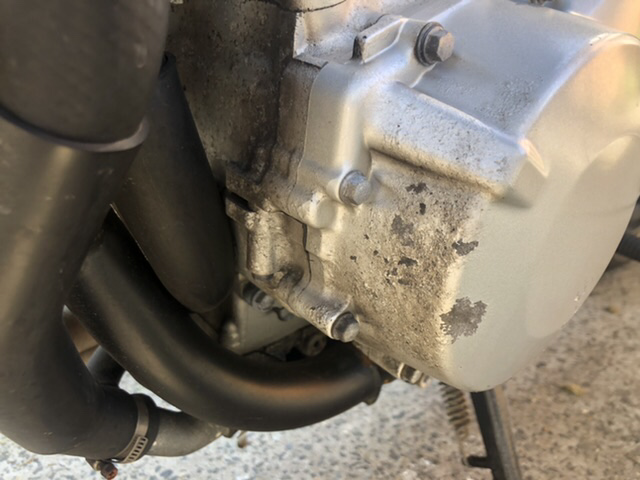
Sprayed the area down with degreaser and gave it a good clean off to remove any greasy crud. Hosed down and dried with a clean rag.

Sanded all the nasty shit and large gouges off with the 120 grit wet & dry. Once all that was gone I hit it with the 320 grit till it was as smooth as I could get it, then smoothed it out more with the 400 grit. Hosed it all down again. Where water beaded on any of the surfaces to be painted I hit them again with degreaser and gave them another buff with the 400 grit paper.

Masked the whole area off carefully including the bolts.
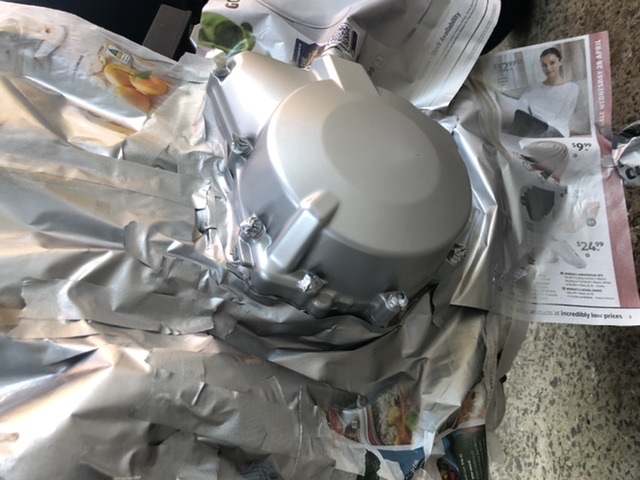
Sprayed according to the instructions on the tin (2 light coats and one medium coat, 10 min apart)

Waited an hour and removed the masking. And that’s it! The colour was a perfect match, despite only really spraying the front half of the cover you really can’t see where the old and new paint meet. Might give it a buff with really fine wet & dry once it’s fully cured, but tbh it doesn’t need it.
Time taken:
- about an hour, plus an hour for drying
Materials used:
- Dupli-Color engine enamel (DE1615 aluminium colour)
- 120, 320 and 400 grit wet & dry sandpaper
- can of Repco spray degreaser
- masking tape
- last weeks Aldi cattledog

Sprayed the area down with degreaser and gave it a good clean off to remove any greasy crud. Hosed down and dried with a clean rag.

Sanded all the nasty shit and large gouges off with the 120 grit wet & dry. Once all that was gone I hit it with the 320 grit till it was as smooth as I could get it, then smoothed it out more with the 400 grit. Hosed it all down again. Where water beaded on any of the surfaces to be painted I hit them again with degreaser and gave them another buff with the 400 grit paper.

Masked the whole area off carefully including the bolts.

Sprayed according to the instructions on the tin (2 light coats and one medium coat, 10 min apart)

Waited an hour and removed the masking. And that’s it! The colour was a perfect match, despite only really spraying the front half of the cover you really can’t see where the old and new paint meet. Might give it a buff with really fine wet & dry once it’s fully cured, but tbh it doesn’t need it.

Last edited by Meatbix on Thu 29 Apr 2021, 11:20 pm; edited 6 times in total

Meatbix- Posts : 51
Join date : 2021-03-26
truck and Joflewbyu2 like this post
Re: Fixing “Suzuki rot” on engine cover
![]() Meatbix Thu 29 Apr 2021, 6:11 pm
Meatbix Thu 29 Apr 2021, 6:11 pm
Sorry for the rubbish formatting, still getting the hang of posting to this forum on a mobile :/
Meatbix- Posts : 51
Join date : 2021-03-26
Re: Fixing “Suzuki rot” on engine cover
![]() GSX1100G Thu 29 Apr 2021, 8:31 pm
GSX1100G Thu 29 Apr 2021, 8:31 pm
you are spot on re colour, excellent. Now I know what code to get the paint mixed to do frame etc for when I complete the trailer. 
_________________
Suzuki 1250 Bandit - LOVING IT ! !

GSX1100G- Posts : 783
Join date : 2019-11-08
Age : 61
Re: Fixing “Suzuki rot” on engine cover
![]() Meatbix Thu 29 Apr 2021, 8:41 pm
Meatbix Thu 29 Apr 2021, 8:41 pm
Lol code? It was an off the shelf rattlecan from Supercheap! Wasn’t actually expecting it to be that good but figured it’d still be an improvement from the shitty state it was in.GSX1100G wrote:you are spot on re colour, excellent. Now I know what code to get the paint mixed to do frame etc for when I complete the trailer.
Meatbix- Posts : 51
Join date : 2021-03-26
Re: Fixing “Suzuki rot” on engine cover
![]() GSX1100G Thu 29 Apr 2021, 8:56 pm
GSX1100G Thu 29 Apr 2021, 8:56 pm
I'll be using Dulux metal shield white, I can tint it to that or very similar colour code. There will be a number of some description on a can, will have look next time I'm thereMeatbix wrote:Lol code? It was an off the shelf rattlecan from Supercheap! Wasn’t actually expecting it to be that good but figured it’d still be an improvement from the shitty state it was in.GSX1100G wrote:you are spot on re colour, excellent. Now I know what code to get the paint mixed to do frame etc for when I complete the trailer.
GSX1100G- Posts : 783
Join date : 2019-11-08
Age : 61
Meatbix likes this post
Re: Fixing “Suzuki rot” on engine cover
![]() Meatbix Thu 29 Apr 2021, 10:23 pm
Meatbix Thu 29 Apr 2021, 10:23 pm
Mate you’re all over it, I’m just a rank amateurGSX1100G wrote:I'll be using Dulux metal shield white, I can tint it to that or very similar colour code. There will be a number of some description on a can, will have look next time I'm thereMeatbix wrote:Lol code? It was an off the shelf rattlecan from Supercheap! Wasn’t actually expecting it to be that good but figured it’d still be an improvement from the shitty state it was in.GSX1100G wrote:you are spot on re colour, excellent. Now I know what code to get the paint mixed to do frame etc for when I complete the trailer.
The code on the sticker is DE1615 Aluminium, hope that’s what you’re looking for
Meatbix- Posts : 51
Join date : 2021-03-26
GSX1100G likes this post
Joflewbyu2- Posts : 35
Join date : 2020-08-24
truck likes this post
Re: Fixing “Suzuki rot” on engine cover
![]() madmax Sun 09 May 2021, 6:11 pm
madmax Sun 09 May 2021, 6:11 pm
To do the bolts, take most of them out. I think I left only 2 or 3 in. Paint as required then replace the bolts. When dry, remove the 3 that got painted and clean them up with thinners.
_________________
2020 BMW R1250RS Exclusive

madmax- Posts : 4305
Join date : 2011-10-19
Age : 60
Location : Carrum Downs, Victoria
Re-Cycled likes this post
» servicing/fixing tools
» Devils work
» Help - replacing engine cover
» Left hand engine cover
» Painted or polished engine on 2008 Suzuki Bandit 1250 S
» Devils work
» Help - replacing engine cover
» Left hand engine cover
» Painted or polished engine on 2008 Suzuki Bandit 1250 S
Page 1 of 1
Permissions in this forum:
You cannot reply to topics in this forum|
|
|